Step 1: Set Up Langtrace Cloud
To begin sending traces, you’ll need to set up your Langtrace Cloud account:- Sign up by going to this link.
- After signing up, create a new Project. Projects are containers for storing traces and metrics generated by your application. If you have only one application, creating 1 project will suffice.
- Generate an API key. This key will be used to authenticate your application with Langtrace Cloud.
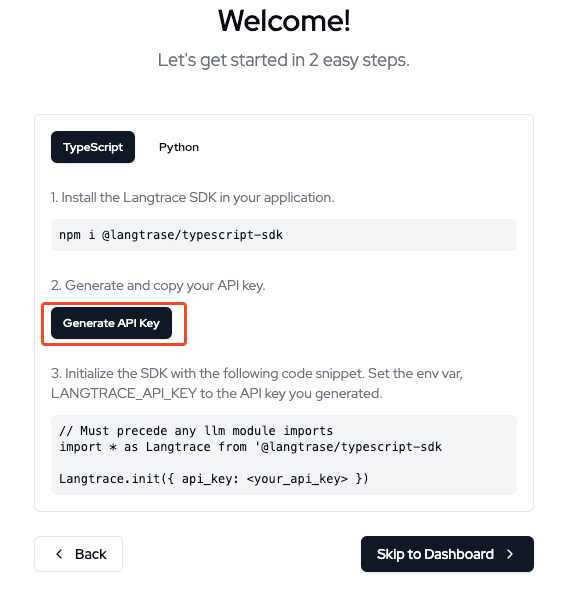
Step 2: Install and Initialize the SDK
To start sending traces, you need to install the Langtrace SDK and initialize it with your API key. Follow these steps:<LANGTRACE_API_KEY> with the API key you generated in Step 1.
Step 3: Create and Send Traces
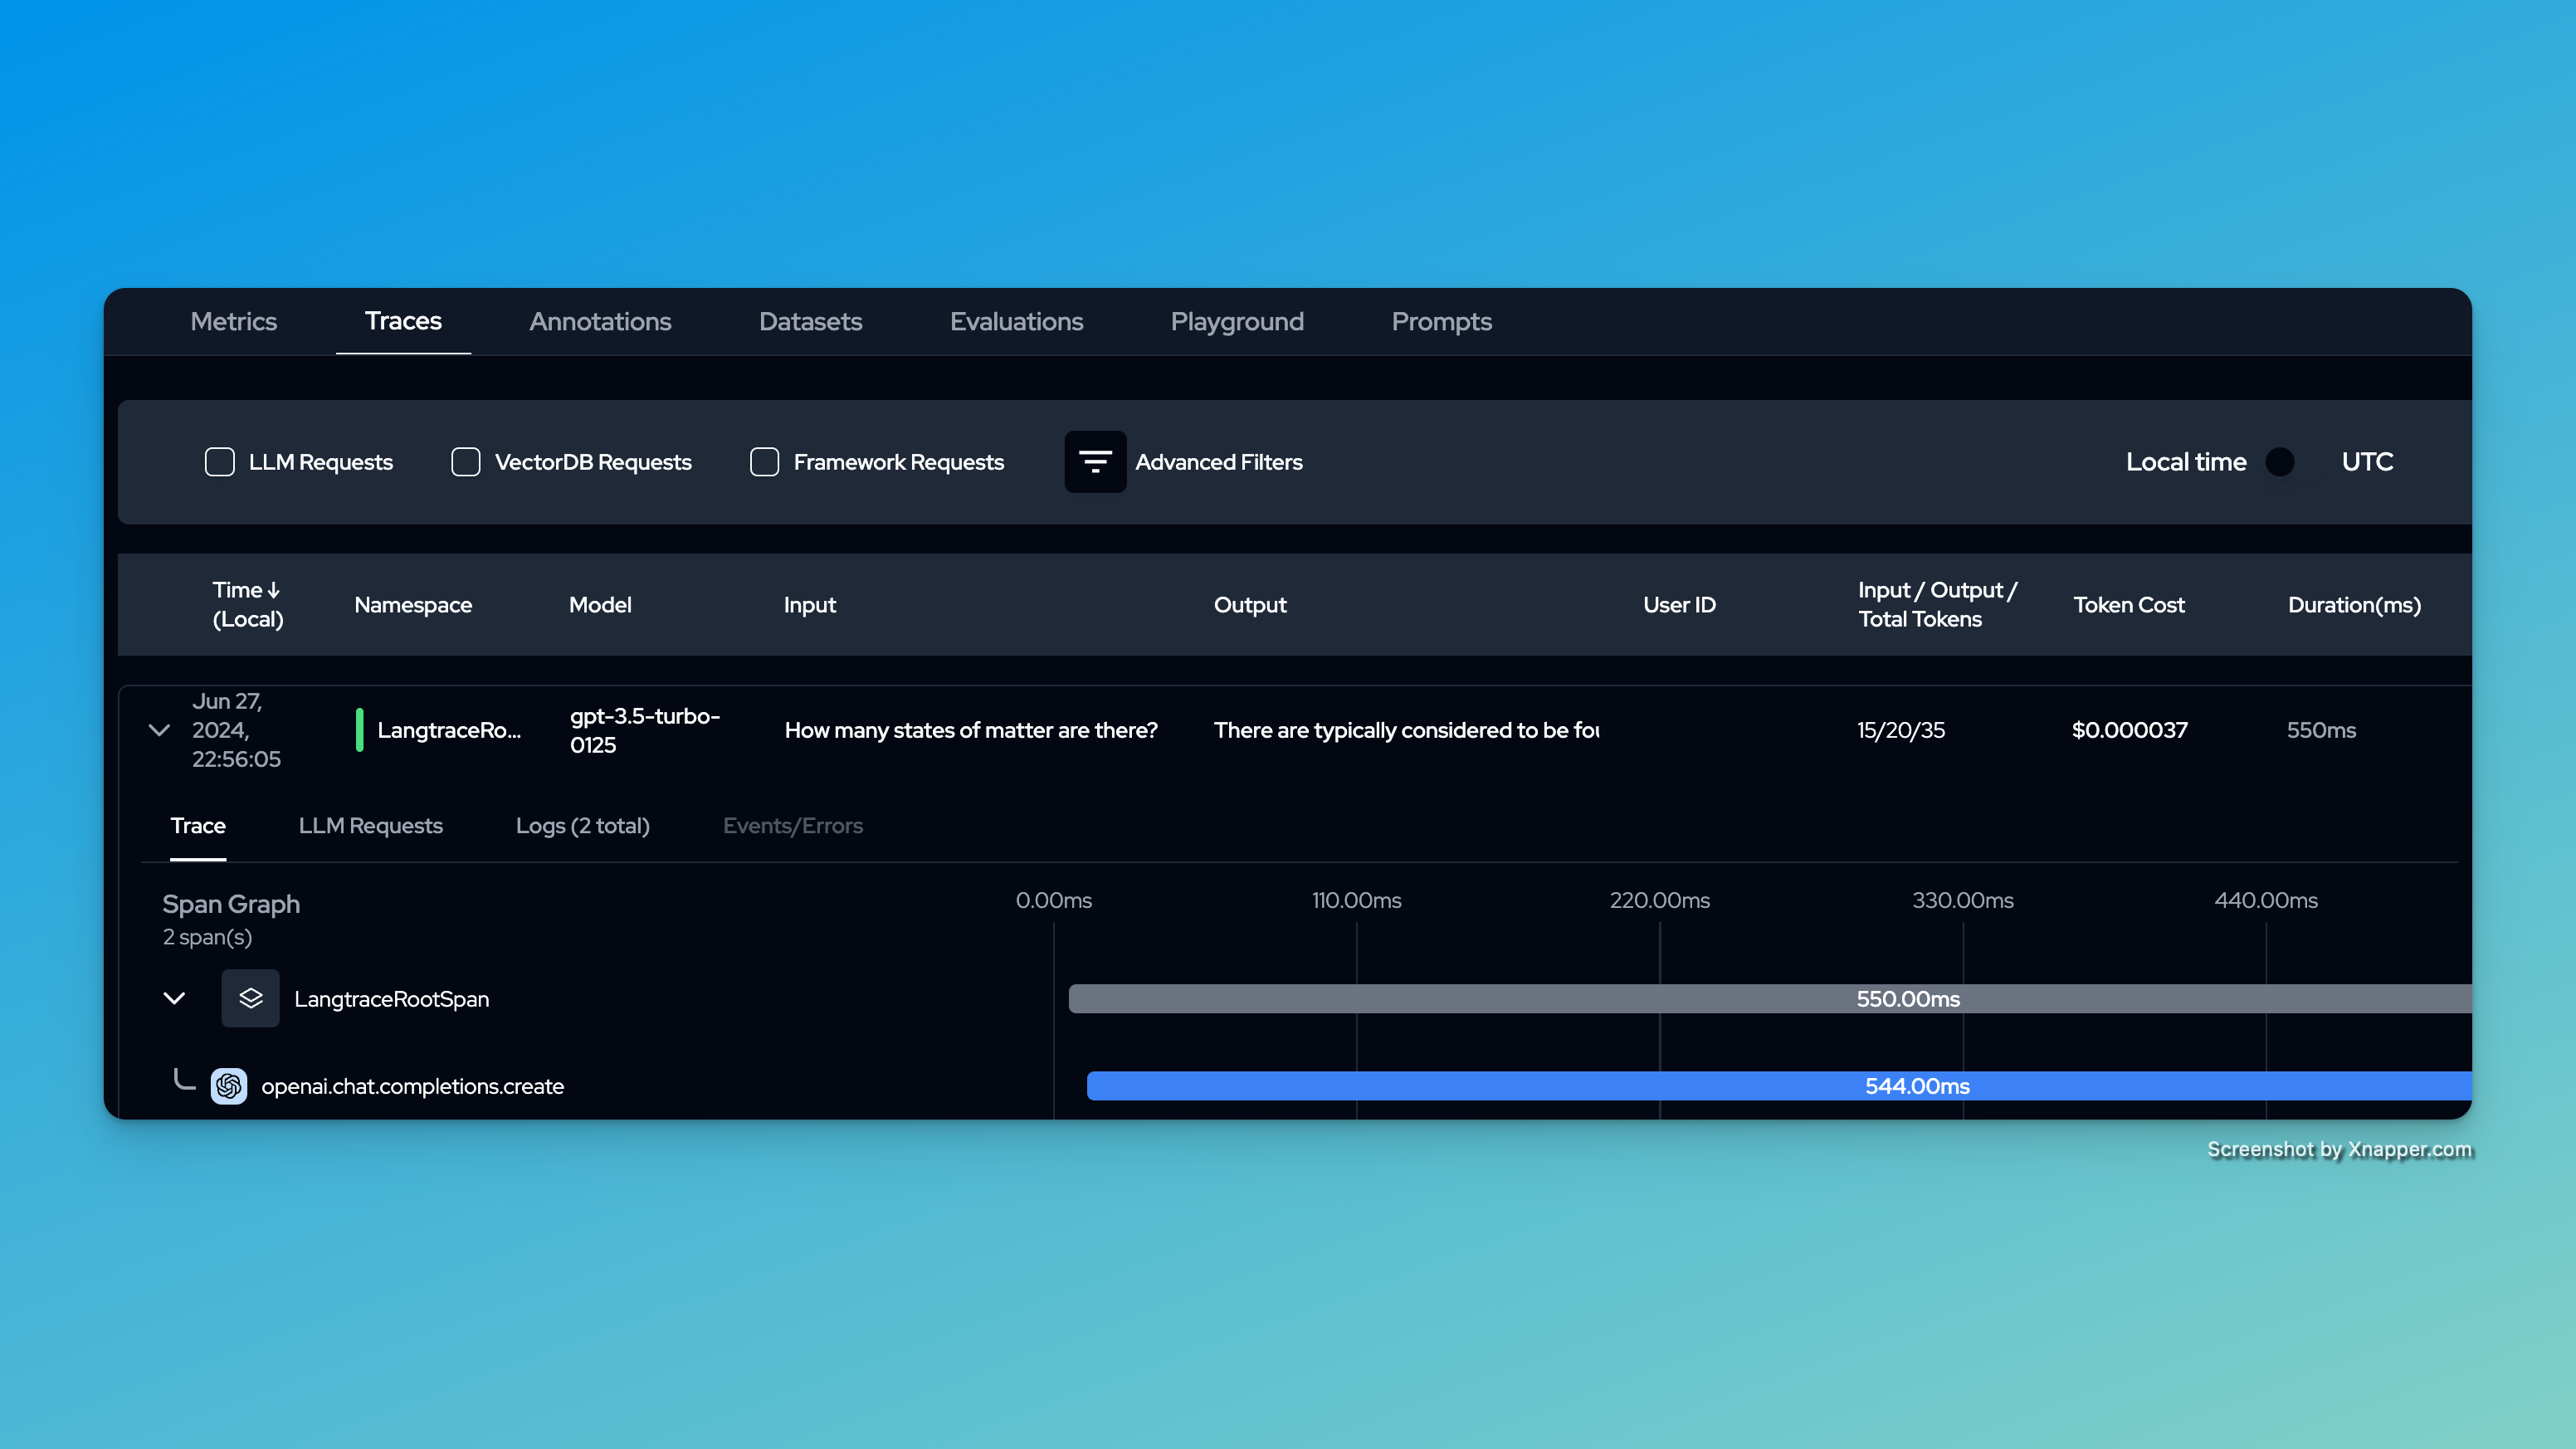
Once the SDK is initialized, Langtrace will automatically capture traces from supported LLM integrations.
Example: Sending Traces from an OpenAI Application
Here’s an example of how to send traces from an LLM application using the OpenAI API. This example demonstrates how to use the Langtrace SDK to send traces from an OpenAI completion request.Make Sure to pip or npm install the required packages before running the code.
Next Steps
Now that you’ve set up Langtrace and are sending traces, you can:- View Your Traces: Log in to your Langtrace Cloud account to view and analyze the traces you’ve sent.
- Customize Your Tracing: Explore adding custom attributes or spans to capture more specific data about your LLM operations.
- Integrate with Your Workflow: Consider how you can use the insights from your traces to optimize your LLM applications.
- Explore Advanced Features: Check out our other guides to learn about features like:
Troubleshooting Common Issues
If you encounter problems while setting up or using Langtrace, here are solutions to some common issues:API Key Not Recognized
API Key Not Recognized
Ensure you’ve copied the full API key correctly. Verify that it’s either:
- Set as an environment variable named
LANGTRACE_API_KEY - Passed directly to
Langtrace.init()as shown in Step 2
Traces Not Appearing in Dashboard
Traces Not Appearing in Dashboard
If your traces aren’t showing up in the Langtrace dashboard:
- Check your network connectivity
- Verify that your application has permission to make outbound connections
- Ensure you’re looking at the correct project in the dashboard
- Wait a few minutes, as there might be a slight delay in trace processing
SDK Import Errors
SDK Import Errors
If you’re seeing import errors:
- Confirm that you’ve installed the correct version of the SDK for your programming language
- Verify that the SDK is compatible with your project’s dependencies
- Try reinstalling the SDK:
Automatic Instrumentation Not Working
Automatic Instrumentation Not Working
If automatic instrumentation for supported LLM libraries isn’t working:
- Ensure that you’ve initialized Langtrace before importing any LLM libraries
- Check that you’re using a supported version of the LLM library
- Verify that the LLM library is included in the
instrumentationsoption (TypeScript SDK only):